 |
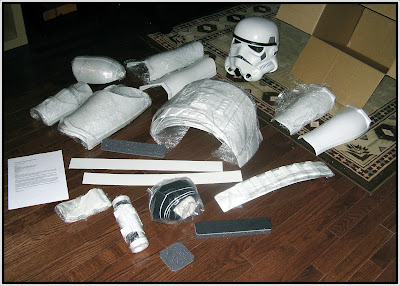
| From Stormtrooper Armor Build |
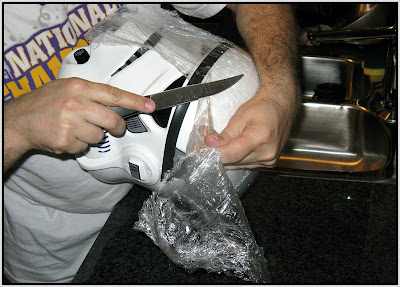
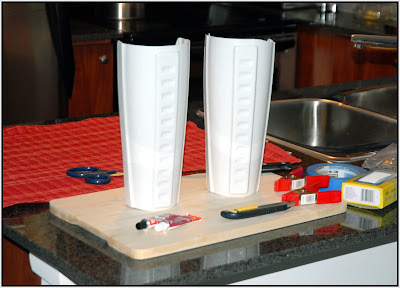
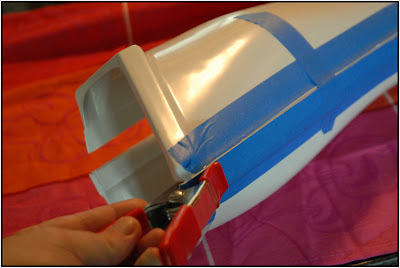
Got to be very careful when removing the plastic, I myself used a J.A Henckles steak knife to do the job, nothing but the finest German steel for my armor.
 |
| From Stormtrooper Armor Build |
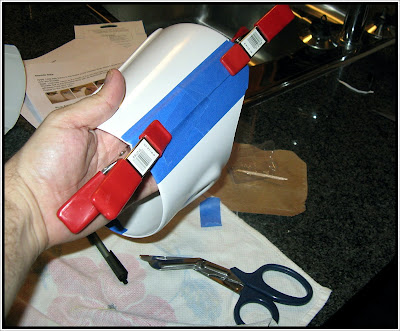
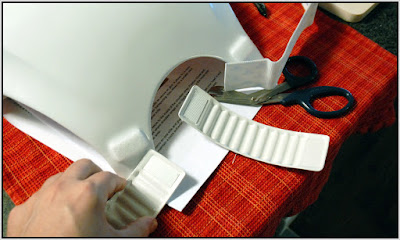
Ok I decided to start with an easy piece so I did the biceps. I used Lepage 5 minute Apoxy glue on one side and Velcro on the other . I tryed to buy the apoxy that came in the syringe but it was totally dryed out. So I went back to the store a second time and bought the glue that came in two separate tubes. I used blue painters tape to stop excess glue from getting on the armor and the clamps I left on for about 10 minutes.
 |
| From Stormtrooper Armor Build |
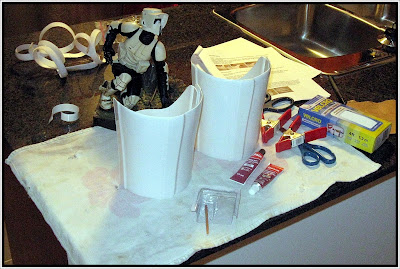
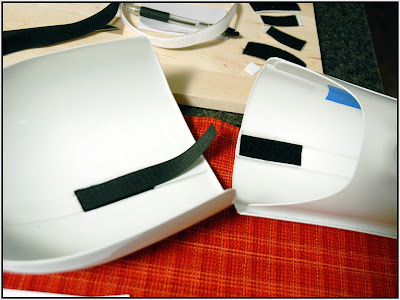
Here are the biceps completed, you gotta be careful with the glue it's extremely strong stuff, if you screw it up and make a mess there are no second chances. As fortune would have it my first assembly was a success.
 |
| From Stormtrooper Armor Build |
I finished the forearms, not much different than the biceps used Apoxy glue on one side and velcro on the other..
 |
| From Stormtrooper Armor Build |
I attached the shoulder straps to the chest plate using industrial velcro, also added velcro to the back plate as well. This will help hold the straps in place. The instruction say to use appoxy but I decided against it. I've researched how others approach this part and most do not use glue so I'm goin with the crowd.
 |
| From Stormtrooper Armor Build |
The Shoulder bells attach to the bicep armor using velcro, this part ain't exactly rocket science.
 |
| From Stormtrooper Armor Build |
There are distinct inner and outter halves for both left and right of the calf . Just like on previous parts, I used appoxy on the front and velcro on the back. Gettin tired of hearing me repeat myself, too bad.
 |
| From Stormtrooper Armor Build |
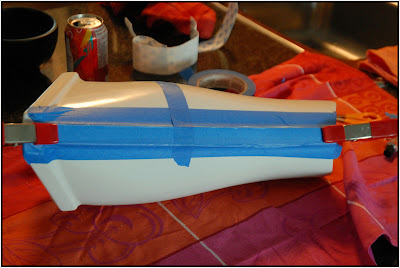
Another veiw of my masterpeice in progress.
 |
| From Stormtrooper Armor Build |
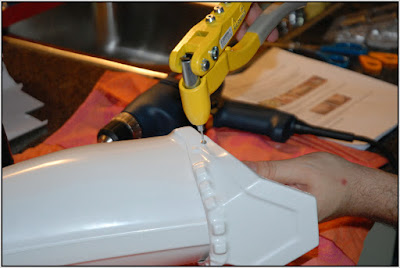
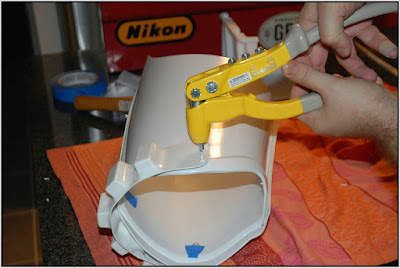
This next part made me extremley nervous because I aint what you'd call a handyman. After drilling a hole in either side of the Shin/Calf armor and also in the sniper plate, I used rivets to attach them, I put washers on the opposit side to make sure they stay nice and sturdy. I was so sure I was going to crack the armor, and make a total mess of things, but as fortune would have it, everything worked just fine.
 |
| From Stormtrooper Armor Build |
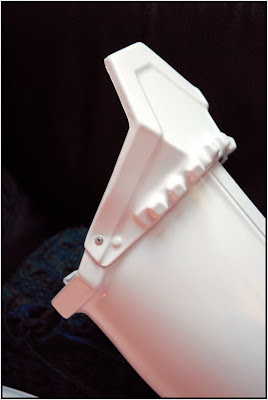
And here's what it looks like...not to bad if I do say do myself.
 |
| From Stormtrooper Armor Build |
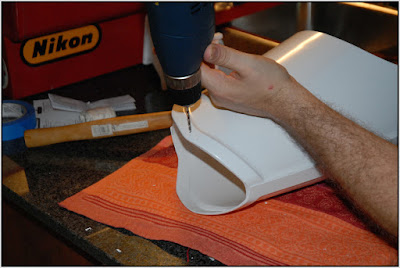
Drilling holed in the thigh peice, you'll see why in a sec.
 |
| From Stormtrooper Armor Build |
Once again I used the rivet tool to attach the power cells to the thigh armor.
 |
| From Stormtrooper Armor Build |
Started working on the webbing. The Chest, Ab and Cod will be linked useing a combination of velcro and buckles...but mostly velcro.
 |
| From Stormtrooper Armor Build |
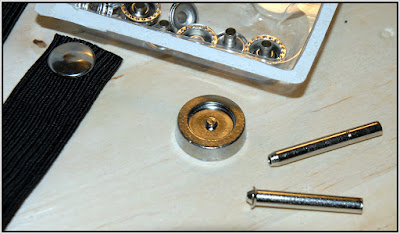
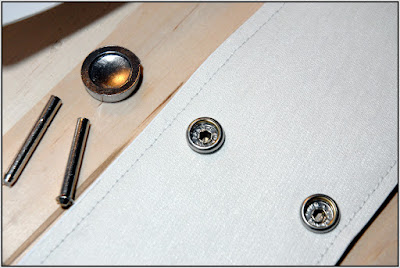
I bought the heavy duty snap fastener kit at Fabric World. It comes with 10 sets of snaps, which should be about as many as I need. I cost me $5.25 including tax. RT --- also includes an additional 6 sets when you buy the armor.
 |
| From Stormtrooper Armor Build |
I used heavy duty snaps to attach the thigh armor to the cod peice, velcro also works great.
 |
| From Stormtrooper Armor Build |
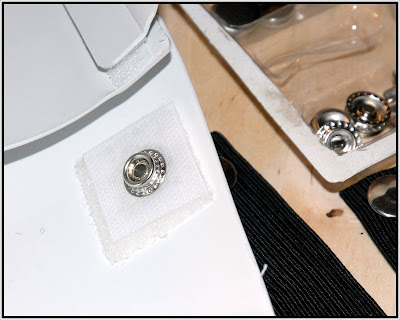
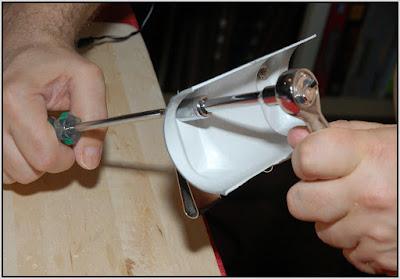
And once again I used industrial snaps to attach the ABS belt to the canvas belt.
 |
| From Stormtrooper Armor Build |
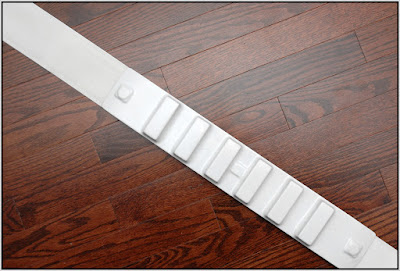
The canvas belt with the snaps attached, you may want to get a proper snap tool, I found that useing a hammer and the little steel peice provided (left) was a bit tricky.
 |
| From Stormtrooper Armor Build |
Here a picture of the completed belt ( front only ). The battle is of course only half over, the Thermal detonator still has to be attached to the back.
 |
| From Stormtrooper Armor Build |
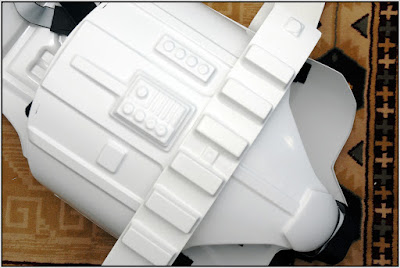
This is were it will eventually sit. If I can ever get the damn thing done. I took me three hours to attach to ABS plastic belt to the canvas belt.
 |
| From Stormtrooper Armor Build |
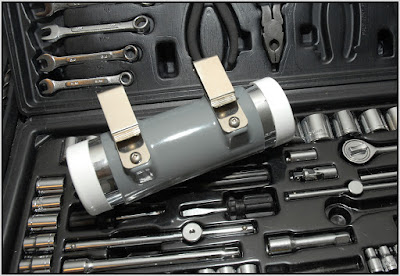
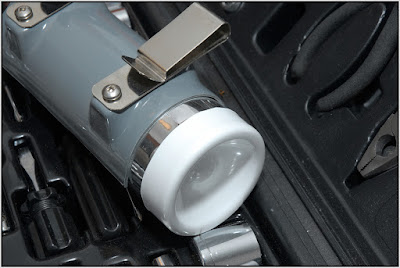
After spray painting the back of the Thermal detinator grey I drilled two holes so I could attach the belt clips.
 |
| From Stormtrooper Armor Build |
I used metal screws to attach the belt clip to the back of the TD, I also put a bit of apoxy glue on the screw so it stays in place forever...err...hopefully.
 |
| From Stormtrooper Armor Build |
Here's a shot of the back of the Thermal detonator with the belt clips attached. If there are any question about my procedure send me an e-mail and I'll do my best to confuse you even more.
 |
| From Stormtrooper Armor Build |
A fine job if I do say so myself.
 |
| From Stormtrooper Armor Build |
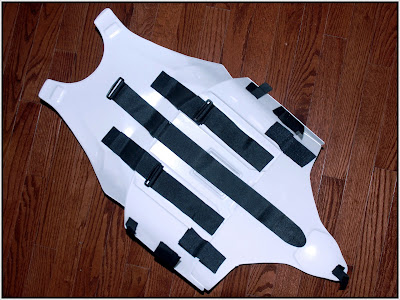
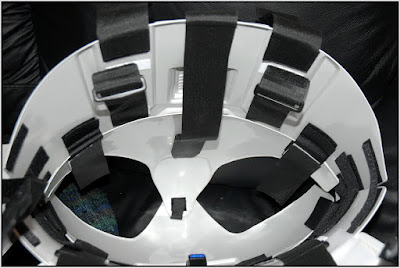
This will give you an idea how the webbing holds the entire suit together. I desighned it to I can just step into it. The only problem with this approach is that you will need some help attaching the chest plait and shoulder straps to the back peice once it's on. The way I have done it is deffinatly not the easiest way, you will always need assisstance getting dressed, but it works for me.The nice thing about and ALL velcro assembly is that at a later date I can always change it.
 |
| From Stormtrooper Armor Build |
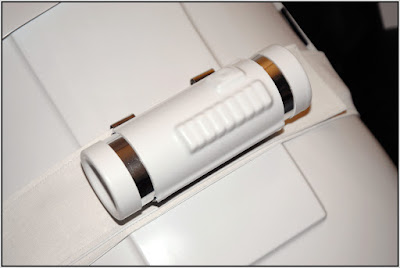
And here's a shot of the Thermal detonator attached to the back of the belt.
 |
| From Stormtrooper Armor Build |
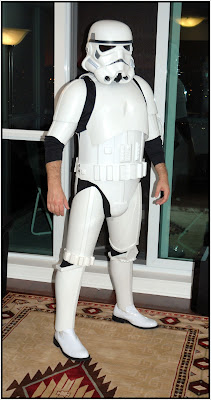
Although it was'nt entirly done I just had to do a test fitting...not bad ehh...it hides my beer belly...can someone please pass me a Bud.
 |
| From Stormtrooper Armor Build |
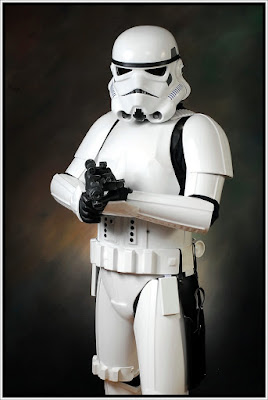
And here it is, the completed project, I'll add some fans, speakers to the helmet at a later date.
 |
| From Stormtrooper Armor Build |
I just replace the AB button ( little black buttons on the stomach ) with screen accurate AB buttons which I ordered from Vader Dave in Des Moines, Iowa. These are the colors used in the original Star Wars movie they consist of 6 grey and 3 blue buttons.
 |
| From Stormtrooper Armor Build |
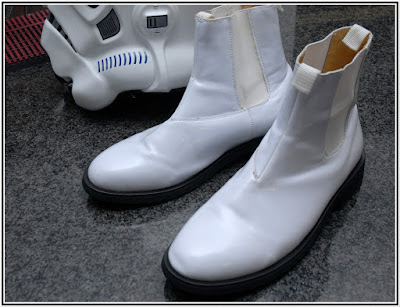
The final part to my puzzle were the boots, these I ordered from Champion Attitude ( CABOOTS ) in El Paso, Texas. They provided excellent service arriving in just over a week, now I'm finally ready to go.
 |
| From Stormtrooper Armor Build |
Now it's time to go hunt some rebel scum...
 |
| From Stormtrooper Armor Build |
For more information on the artist that engineered this high quality armor which is commonly known as the RT-Mod please see think below...
http://www.rt-mod.com/
14 comments:
Cool armor.
Thanks, much appreciated.
Recieved an two e-mails inquiring where to get the belt clips to attach the TD. The Tandy Leather factory is a good place to look, thats were I got mone. You will most certainly find what you are looking for. see link bellow...
http://www.tandyleatherfactory.com
The suit looks great... I'm just about to pick up an RT Mod... I'm also in T.O. Where did you get the blaster and boots from?
Cheers...
Ah... just read the part about Champion Attitude... just wondering about the blaster then...
Hey Sam, sorry about the delay in responding. The blaster is a standard toy Hasbro, with a resin modification kit, which makes it look more movie accurate. It aint perfect but it's pretty cool and most importantly it's cost effective... I'll find the link to the supplier of this resin kit and post it in a few days, Cheers Dude.
No worries man, I actually found it a while back... gun is complete, added some wires and power node caps to it as well... getting the suit in about a week... did you ever pick up a voice mod? Thinking about it but the $200 price tag is kinda steep... Cheers!
I know exactly the unit your talking about, I saw it on whitearmor.net. I thought about grabbing one myself, but I can't really afford it atm (mortgage). I picked up a cheap little speaker/headset unit from e-bay for about 30 bucks. No static burst of course, but it does the job, I'll use it until I can aford something better.
I'm midway through my build, using your blog as a guide... very helpful. But wondering how you fastened the belt in the back... velcro? And how did you keep the belt clips/button backs from scratching the hell outta the back of your suit?
Cheers
Hey Sam, LOL better late than never. It's velcro. I used snaps to attach the ABS belt (plastic part of the belt that goes around the front) to the canvas belt that extends all the way around the waist. The entire canvas belt is held in place with industrial velcro.
Haha... most... disjointed... conversation... ever... Thanks for the help, I finished mine just before halloween last year... huge success.. still having a few issues with the shoulder straps as I don't want to rivet them and the velcro is tenuous at best.. After some adjustments it seems to hold well... Cheers!
I really love the velcro assembly - any way you can give more detailed images?
DW
Hey Sam, I too have an issue with the shoulder straps, and I too did'nt want to rivet them. I solved the problem by wrapping some scotch tap around them prior to a troop. LOL..It aint facy but it works, scotch tap is nearly invisible. Hey Anonymouse, unfortunatly I don't have any other shots of the velcro assembly that would provide more detail. Check out "Daves Garage" on Youtube. He does a really cool step by step assembly of FX armor, I found it very helpful.
where did you order the pieces from
Post a Comment